
BMW 1998 e39 Hands Free Car Kit Installation.
Disclaimer:
These instructions are for 1998 BMW e39 and shall be used for informational purposes only. I CAN NOT be held responsible for any misfortune you might have trying to do this installation. YOU ARE DOING THIS AT YOUR OWN RISK.
Parts purchased:
From Smarteq (http://www.smarteq.com/) 1X Nokia 8260 Handsfree Pro P/N 70939.
From Digi-Key (http://www.digikey.com/) 1) 1X Header P/N 22-55-2181-P 2) 8X Pins P/N 16-02-0114-C (You can use a header from Radio Shack P/N 910-1530 instead of Digi Key header parts.)
From Radio Shack (http://www.radioshack.com/) 1) 1X 1/8" Mono Phone Plug P/N 274-0286 2) 1X 2.5mm Inline Plug DC Power Connector P/N 274-0289
From BMW Dealer 1X Microphone P/N 84 31 8 380 338
I used above parts to connect the hands free control box to the BMW wiring harness under the center console. I used two short pieces of speaker wire to solder on the 1/8" Mono Phone Plug PN 274-0286 and the 2.5mm Inline Plug DC Power Connector P/N 274-0289 to connect the Mic and Speaker ports on the Nokia unit to the car wiring. The wiring harness which came with the hands free kit contained 4 wires; power, ignition, radio mute and ground these were soldered onto the header in the appropriate positions using wiring code provided below. All wiring color codes are a courtesy of DRaven.
Visit http://www.bmwtips.com/ Tips and Tricks, Stereo/Nav/Cellphone/Electronics: #17 for 99+ phone wiring and #18 for more 98 e39 phone wiring pics.
Center Console - AMP 18-pin Female
---------------------
Pin# Wire Color/Function
Left Side of Trunk (Driver Side) - Female DB-25
---------------------
Pin# Wire Color/Function
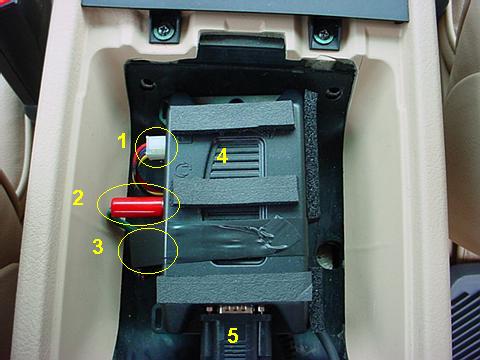
Male connector for AMP 18-pin connector located in center console
--------------------------
Pin# Wire Color/Function
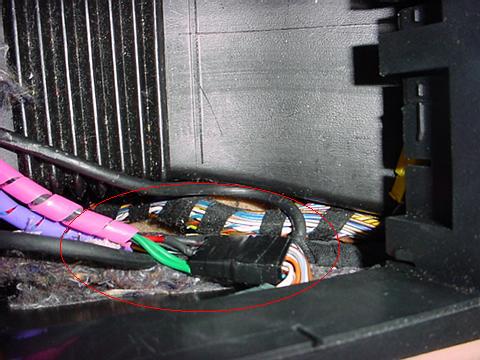
Wiring harness from hands free kit plugged into the BMW phone wiring.
Harness routing through the center console.
You also have to make a Male DB-25 connector for the trunk. Sorry but I don't have a picture or part number, but you can get it at Radio Shack.
DB-25 Adapter for Trunk
--------------------------
Pin# Wire Color/Function
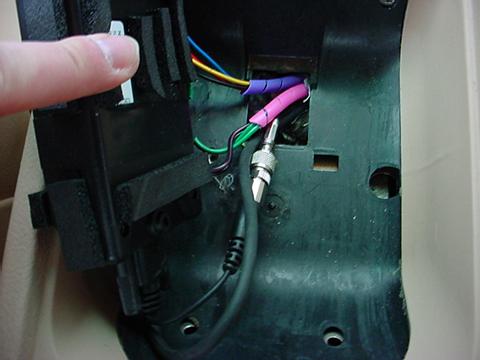
Wire Routing From Phone Cradle to the Hands Free Control Box.
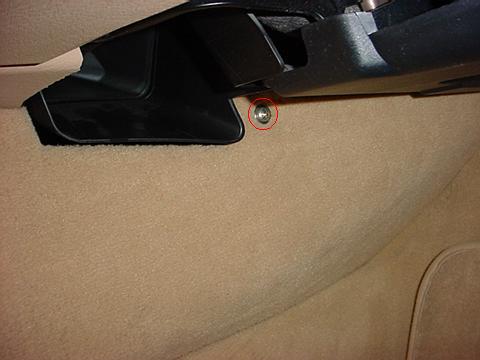
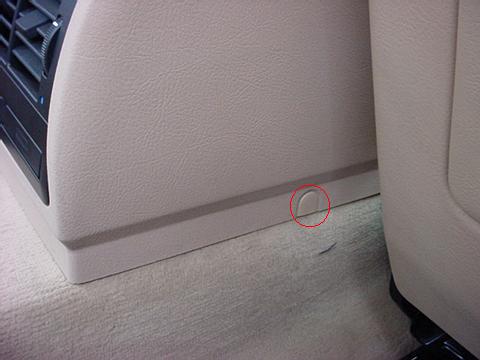
Remove circled screw. (Passanger side front foot well)
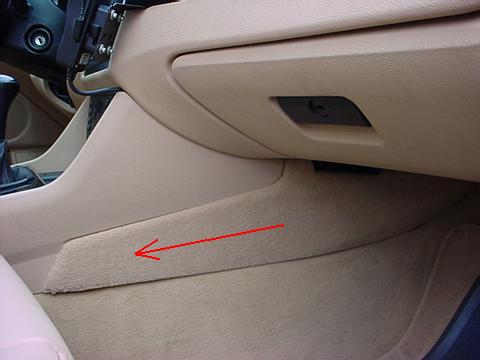
Slide panel in the direction of arrow (rearward) to remove.
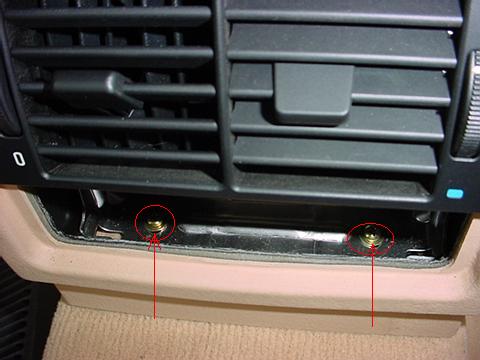
Remove the plugs (driver and passanger side) then remove the screws.
Remove the rear cup holder by opening it and gently pulling back, remove and disconnect the HVAC vents and finally the arm rest can be removed. Remove both circled screws. This loosens up the center console to push the wire between it and the carpet from the phone cradle.

Remove two circled screws. Gently push the wire in the crack between the lower dash and the center console (indicated by arrows) then follow the center consoles lower edge towards the rear of the car (arrows). When you fed the wire under the center console to about where the sliding door storage box is, push the connector underneath also. Now it would be a good time to remove the above mentioned storage box by opening it and pulling it parallel to the bottom of this box. Now connect everyting and test for proper operation.
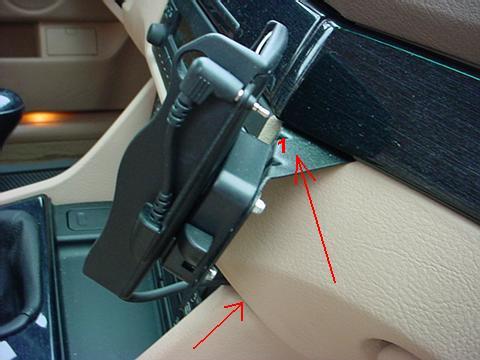
I used a PRO-FIT (http://members.roadfly.com/tslupek/e39.html) bracket (1. P/N BM-51-97 ) to mount the phone cradle on the passenger side of the radio. If everything works then you can tie wrap all loose wires and start putting evrything back in the reverse order you took it off.
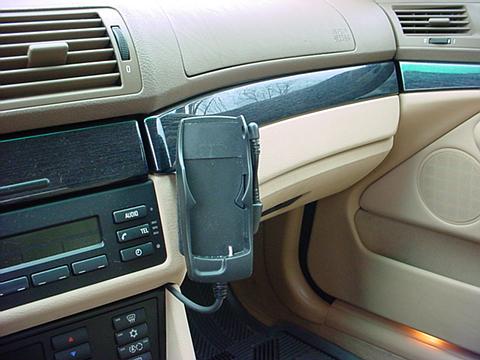
Here is what the completed installation of the phone cradle looks like and it can be removed with minimal amount of work.
Features that work with the aftermarket hands free phone kit.
The complete installation took about 2.5 hours and $220 worth of parts. I did not install an antenna for this, because I do not have reception problems where I travel. This whole installation was worth the time and effort. It makes it so much safer to shift gears for you that have stick shifts, and no dropped phone. The only drawback of this is that you look like a nut case driving and talking to yourself.
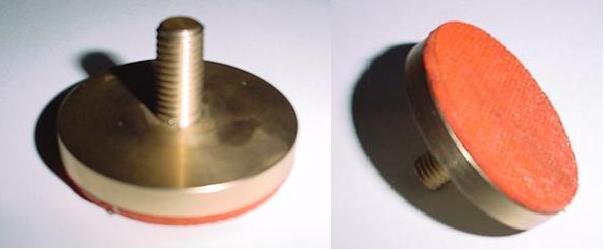
Adjustable Clutch Stop By Tom S.
This part was designed by me and machined out of aluminum bronze. I adjust it by either putting a 10mm nut or some stainless steel washers between the head and the car floor. Clutch feel and engagement is a lot better. No rigging to the start switch was required. The clutch engagement point on my car is right at or slightly above the start switch so the clutch stop is adjusted right below the start switch. I experimented with different heights and I tend to like this clutch stop height, about 1/2" to 5/8" higher than the BMW clutch stop.
Tom Slupek
98 528i 5 spd Oxford Green, NW Burbs of Chicago