Replacing broken headlamp adjusters
Photo by Cooley - 97 528ia
Write up by Vince
What you will need:
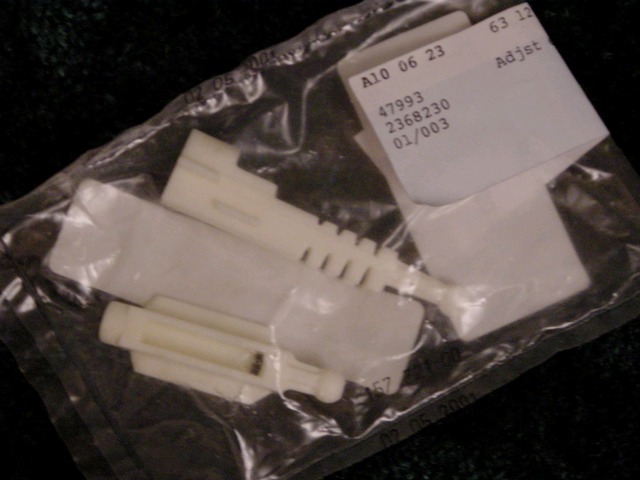
- Part no. 63 12 0 027 924 - includes two adjusters, sufficient for only ONE
headlamp. I bought mine for something like $17.65 at Pacific BMW -list price
is about $22. I needed TWO sets of adjusters (same part no. for each)
for a total price with tax of just under $40 including tax.
- Flathead screwdriver
- Various (small) Torx bits and nut driver. Not sure the sizes for the bits
but my set only has five, and it was sufficient. I'm pretty sure that all were
smaller than 3/16 in diameter.
- A short section (~ 2 feet) of thin rope. I used nylon rope but strong twine
might do.
BACKGROUND:
If you have not seen xenon headlamps torn apart then a short description would
help. The headlamps include a lens cover that can be removed from the headlamp
assembly by prying open the tabs around the periphery. The headlamp assembly
includes a plastic housing and a metal plate inside that is supported from the
rear at three points: by the two (plastic)
adjusters on top, and by the self-leveling servomotor along the bottom.
All three of these points include ball and socket joints to permit movement.
It's a pretty ingenious design to allow the lamps to be manually adjusted and
also automatically dimmed (angled downward) when needed. The problem is that
the darn adjusters are very brittle and prone to breakage. In the case of the
headlamps that I bought, both adjusters on both lamps were severed.
The upshot was that the metal plate (holding both high and low beams) was supported
from the bottom by the servomotor linkage (which is metal, not plastic) and
by the rubber boots from the rear. Suffice it to say that he resulting beams
were VERY jittery. I only tried one in my parking garage, and when I went over
a bump the beam was jumping around all over.
ADJUSTER REPLACEMENT INSTRUCTIONS
1. Remove headlamps from car. Unplug high, low, and turn signals. Remove four
screws holding headlamps in place. Swing headlamps slightly outward and remove.
The following applies to each headlamp:
2. Remove the lens cover by carefully prying apart the restraining tabs along
the periphery. I used a flathead screwdriver.
3. Remove the rubber boot behind each of the high and low beams. It is simply
pressed into place. With the rubber boots removed, it is easy to diagnose whether
the adjusters are broken. If they are broken, then the metal plate within the
plastic housing is supported at only one point (from behind along the bottom).
The adjusters are white brittle plastic. If
the adjusters are broken, the the metal plate will tip forward easily and you
will see two thin pieces of sheared-off white plastic staring back at you.
4. Remove high and low beam bulbs (to prevent breakage). Removal depends on
the bulb type. High beams loosen COUNTER-clockwise about a quarter turn - then
pull out. There are two types of xenon bulb restraints (I know because I have
one of each). Seems like there are three Torx screws around the outside of each
restraining a cover. The bulb pulls out with the cover removed.
5. I removed the glass low beam (focusing?) lens along the center of the low
beam path by removing three Torx screws along the face - and also removed the
black 'half moon" glare screen. This step was precautionary to prevent
breakage.
6. Here comes the hard part - removing the metal plate from the plastic housing.
The self-leveling servomotor has a metal rod pointing forward hat terminates
in a black plastic ball. This ball fits into a plastic socket that has a tab
protruding forward through the metal plate. You have to pull the socket away
from the ball to get the metal plate away from the plastic housing. I tried
prying along the middle with a long flathead screwdriver but was unsuccessful
with this approach. Ultimately I threaded a piece of long nylon rope behind
the metal housing between the high and low beams, gathered the ends into my
fist and pulled -- HARD -- to finally pop the metal plate away from the plastic
housing. I had a helper (my wife) hold the plastic housing while I did this.
Pretty unnerving because I feared I would break something - but I used this
approach without breaking anything for both headlamps. Heard a loud 'pop' -
that was the socket being freed from the ball.
7. With the metal plate removed from the plastic housing, the ball for ach of
the (broken) adjusters need to be removed from the respective sockets. Note
that the adjuster kit available from the dealer does not include replacement
sockets so be careful not to damage those. A bit of gingerly applied brute force
helped. Make sure to support the reflectors to revent breakage.
8. Remove the threaded end of each broken adjuster by unscrewing (counterclockwise)
the adjusting screws on the back of the plastic housing. A good many turns are
required to finally free the broken adjusters.
9. Next, insert the the ball ends of the two new adjusters into the respective
sockets. I recommend doing this while the metal plate is still separated from
the plastic housing. They pop into place with lots of effort. Note that the
"serrated" looking adjuster is for the low beam side (outside) while
the flat-looking adjuster is for the high beam (medial) side.
10. With the metal plate having two associated adjusters protruding rearward,
align the plastic adjusters with the (forward facing) adjusting screws. Engage
the adjusters by turning the adjusting knobs clockwise - again, many turns.
I recommend screwing them into place first, before engaging the ball and socket
joint for the self-leveling servomotor.
11. With both adjusters engaging the screws by a good distance (I almost backed
them down more than halfway to the bottom), double-check to make sure that the
ball and socket for the self-leveling servomotor are aligned, and then press
hard against the metal housing above this joint to pop the ball into the socket.
With new adjusters in place, the metal housing (holding the high and low beam
reflectors) should be well-supported and fairly igid.
12. Reattach rubber boots, and reattach xenon focusing lens with
ssociated half-moon glare blocker behind it.
13. Re-insert high and low beam bulbs.
14. Reattach lens cover.
15. Install headlamps back into car with four screws (two upper and two lower,
all facing upward). Reattach all appropriate cables - high, low, nd turn-signal.
If your car is equipped with self-leveling hardware, econnect that cable too.
16. Adjust the beams by turning the adjusting screws (two per headlamp) as
appropriate. Not sure the exact specs for the adjustment but I marked the
halogen beam pattern on a wall from 25 feet using a black crayon. I plan
to aim the xenons a little lower than my old beams since my car doesn't have
the self-leveling hardware.