Front Speaker Installation

Installing a new set of MB Quart RSB 215 in the stock locations is not that hard, both front and rear doors will take approx 4-5 hours to perform the task.

Parts Needed :

  1. Good set of 5.25" midrange and tweeters, I used the MB Quart RSB 215 for $199 a set.  They sound excellent!  These are the Referenze Premium Series
  2. T10, T15, T30 Torx sockets or screwdriver sets
  3. 4mm Hex Key (Allen Wrench)
  4. 10mm and 13mm Sockets (Rear deck only)
  5. Pliers to strip away wiring sheath
  6. Heat Shrink Wrap (available for $1.99 at Radio Shack)
  7. Soldering Iron and Solder to make a good connection
  8. Kwik 1 Minute Epoxy (CA) $3.99 at most hobby stores
  9. Sleeping Back Camping Pad (Rear door Tweeters on DSP only)


Door Panel Removal - Steps

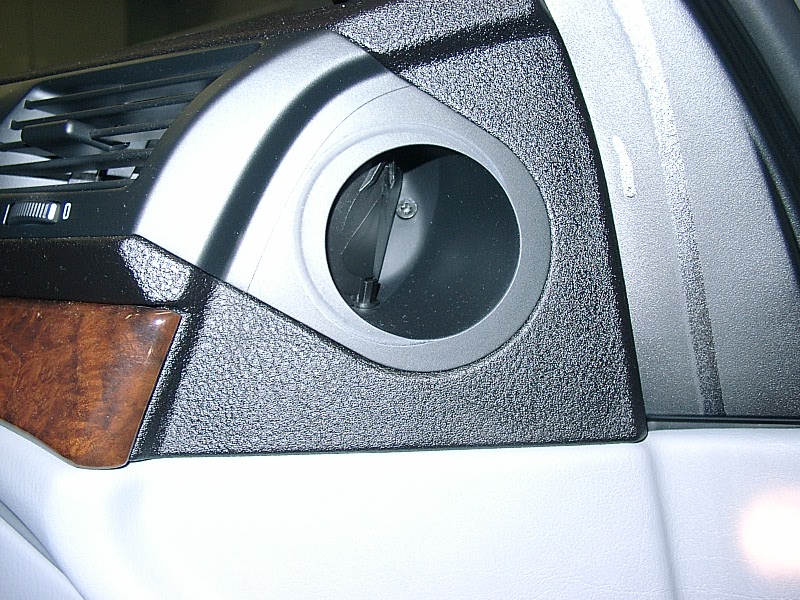
  • Remove screw from inside forward vent flap (very important you do this first to prevent cracking the vent)
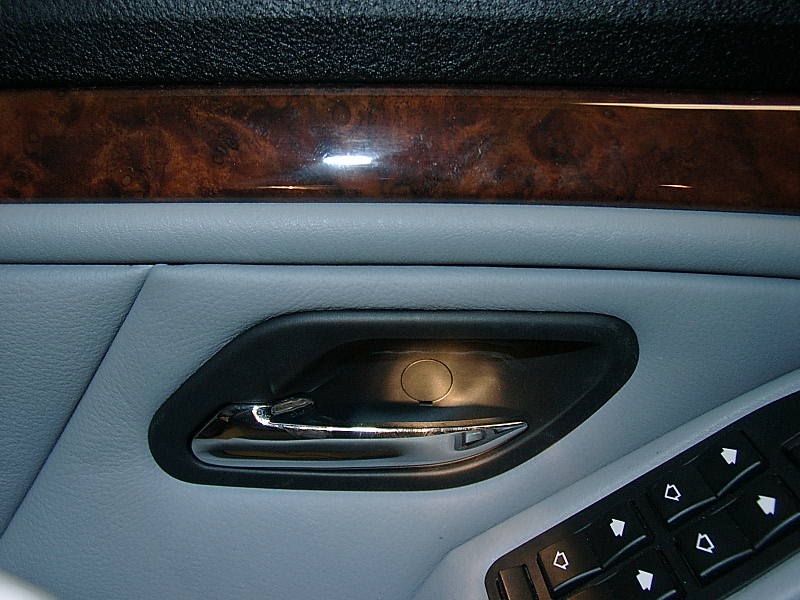
  • Remove screw behind door handle (pop off cover plug first) T15 Torx
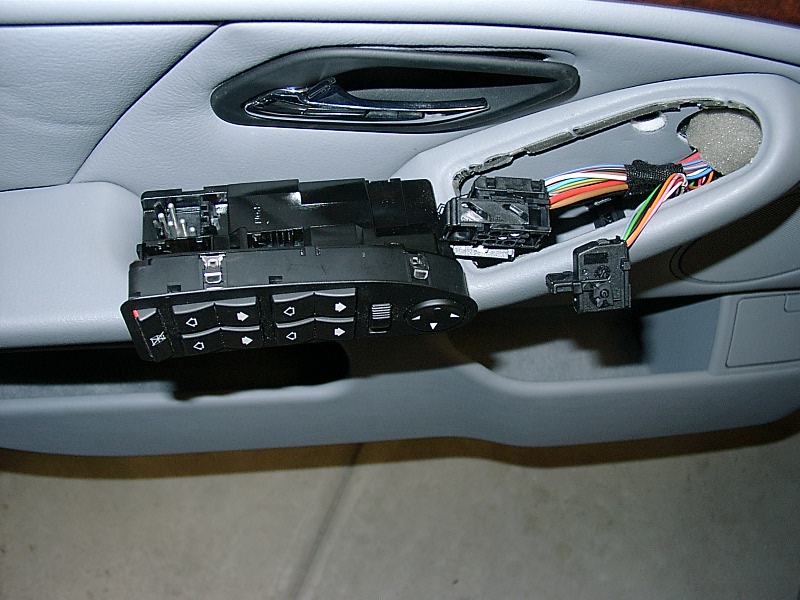
  • Remove window switch (pry out with micro screwdriver, pull out and disconnect wire connectors)
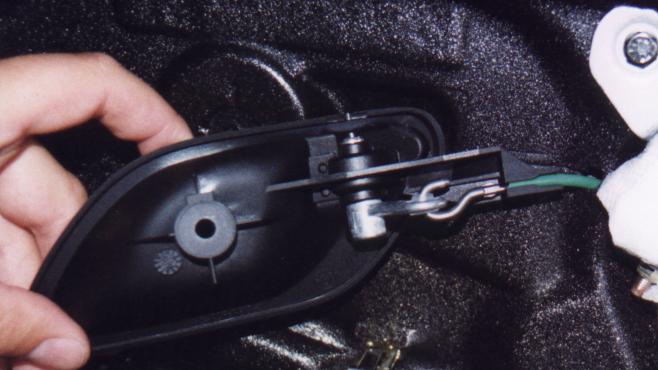
  • Remove lamp unit from bottom of door and disconnect wiring. Pry out with micro screwdriver from the front-most edge.

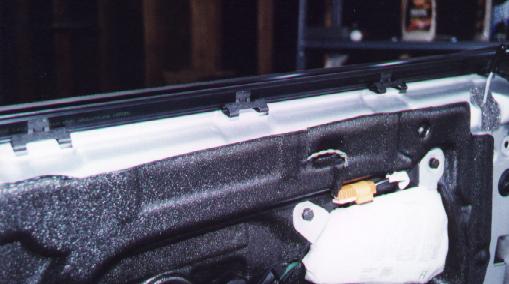
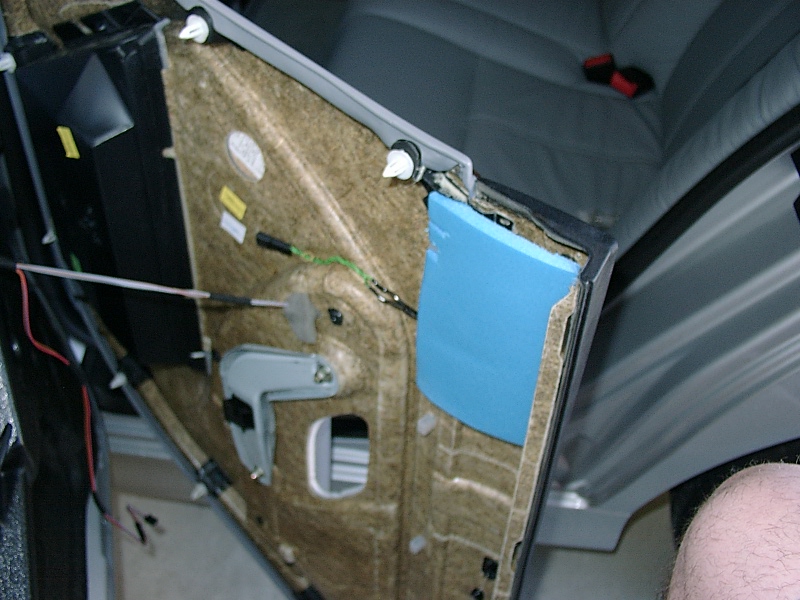
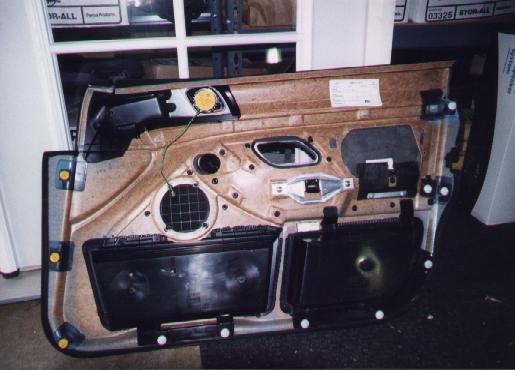
  • The entire lower portion of the door panel is fastened with plastic push in clips around its perimeter. Use a long flat screwdriver (or similar) to pry the panel away from the door at each clip point. Start at the outside upper edge just above and below the opening for the lock (striker). Look for the next clip point and pry as close as you can to it. Be careful at the lower outside area - the clips are mounted on the rear of the plastic storage box (not on the panel). You have to push the screwdriver in all the way to the box and pry on it as opposed to prying on the edge of the panel - otherwise you can end up prying the panel off the storage box.

Left Front Door Panel - Rear View

  • With the lower panel clips all free, pull out slightly on the arm rest handle and then twist and slip the door handle unit back through the opening.
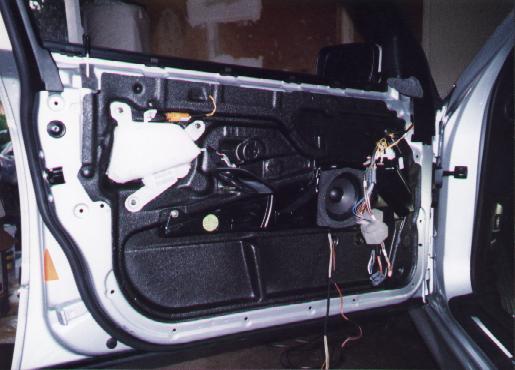
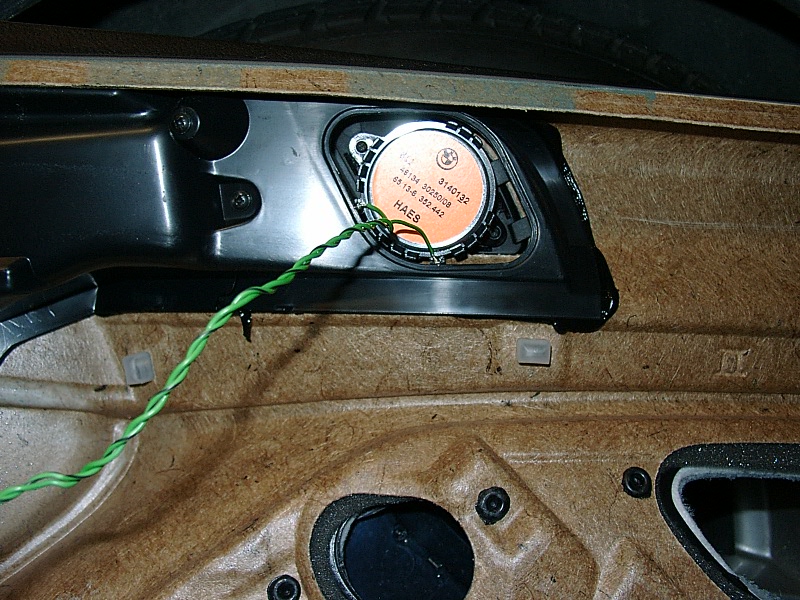
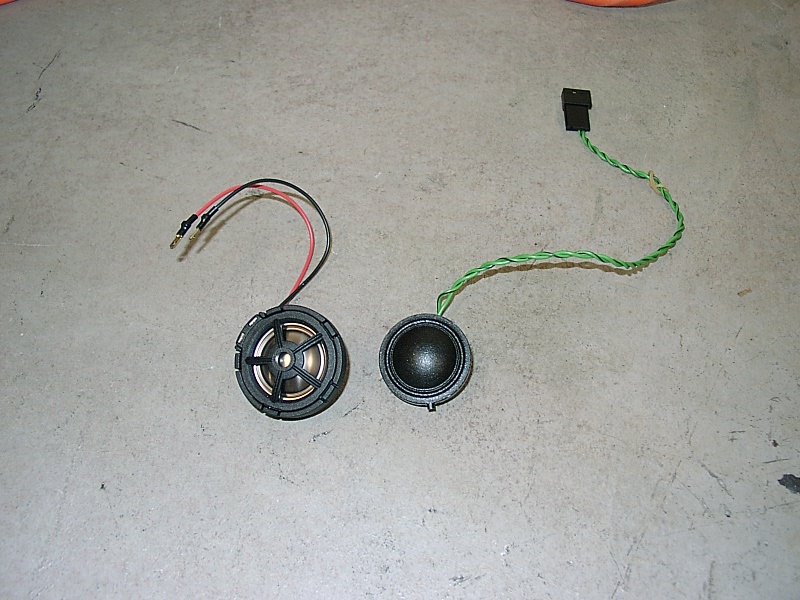
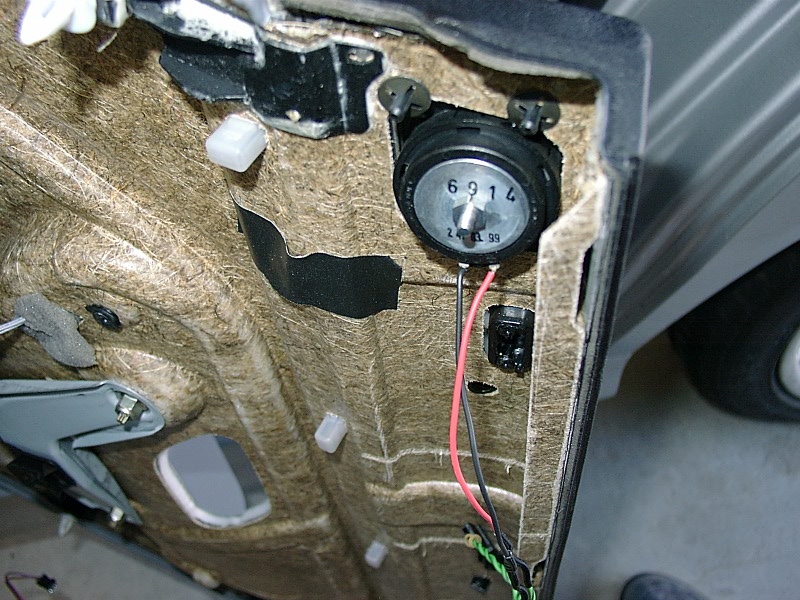
  • Now pull the entire door panel slightly outward at the bottom and then lift upward - may take some wrestling to free it at the connectors by the window. Before removing the door panel reach in and disconnect the midrange speaker wiring connector.

Left Front Door - Fully Exposed

MidBass Woofer Replacement

  • Carefully pull the foam surround away from the speaker.
  • Using a T10 socket or driver, remove the (4) retaining screws - one at each corner.
  • Disconnect the (4) wires from the woofer and remove the driver.
  • NOTE: The woofers in the doors are dual voice-coil woofers. One coil is used for the stereo system, the other is for the cellular phone. DO NOT TWIST THESE WIRES TOGETHER AND USE BOTH PAIRS. I know this because that's what I tried and got hosed. If you wire it this way you'll get mono cross-talk between your left and right channels and the impedance rating for your amp will be all wacked out of joint - not a good thing. I believe the correct pair to use is the shorter one, but double check it using your DVM. I removed the crappy poly fill and replaced it with the good stuff I bought for my sub. Not sure it makes a difference, but seemed like a good idea at the time.
  • Use the supplied weather stipping and affix it to the back of the new woofer frame before mounting. This will insure an air-tight seal. Be sure to route the wiring for the woofer down in the bottom of the sound-box. The new woofer magnet is deep and the driver will not seat correctly if the wiring is behind the magnet.
  • Use the metal ring mounting plates that came with the MB Quart backwards onto the woofer so that it will mount flush with the woofer enclosure.
  • Use the short screws for remounting the woofer in the sound-box. The holes will not line up, but that's ok. Be sure not to over tighten the mounting screws because you will crack the surround. It's a tight fit, so be sure the connectors do not get disconnected while you're wrestling with it.
  • Reattach the foam ring to the new woofer.

New a/d/s/ Front Woofer in Sound Box


Tweeter Replacement

  • Remove the retaining bolt from the tweeter assembly. T30
  • Pull the plastic molding out with the tweeter attached to it.

    Factory Tweeter - Removed

    Left=MB Quart     Right=Stock

View of Front Tweeter Location - Tweeter Removed

  • Cut the wires from the factory tweeter. Leave enough wire on the old tweeter in case you want to reinstall it at a later date.
  • Splice the new tweeter's connections to the remaining piece with the connector on it.  Positive is the wire with the colored stripe on it. Place strips of Heat Shrink wrap over wiring then twist wires together.  Solder wires together with just a small amount of solder.  Bend soldered wiring over to one side and slide heat shrink wrap over solder job and heat with heat gun or hair dryer for a minute.
  • Remove the foam from inside the tweeter cavity.
  • Replace the foam/tweeter assembly and put the molding back in place. You will not be able to bolt the new tweeter in. It's sufficient to just let the foam hold it there.  I used Kwik 1 minute epoxy from Hobby Shack to adhere the foam to the tweeter.

New a/d/s/ Tweeter in Foam Surround - Front View

New a/d/s/ Tweeter in Foam Surround - Rear View

Midrange Speaker can be replaced as well if you have a good quality replacement for it.  I do not know of one yet (haven't looked).

Stock midrange speaker is 53mm in rear diameter.  Anything similar can be placed in that stock door location using CA 1 minute Epoxy and some foam (I use camping pad material)


Reassembling The Door

  • There is a plastic clip that fits into the metal channel behind the arm rest. That clip must be in place as you remount the door - it slides over that metal prong on the door. Be careful that clip does not drop out. THIS STEP IS IMPORTANT!!! 
  • Double check that the cable from the door handle is fully within it's plastic slot. If it slips out when you are pulling the unit back through the door you will find there is some slack in the handle - once you have it all back together - then you have to pull it off again.

Close-up of Door Latch Cable Assembly


Steps

  1. Thread wires back into location for window switch, midrange speaker and lamp before you push the door panel on
  2. Push lock button down and fit door panel over button
  3. Push top panel back into clips at window - just thump them to lock into position.
  4. Make sure you pull the wire for the window switch all the way out of the handle - otherwise it might get caught across the front of the woofer.
  5. Now press the lower part of the door into position - onto that metal pin behind the arm rest.
  6. Checking that each clip is over it's corresponding hole just push each clip into place around the door edge. You'll hear a definite snap sound when they're in place.
  7. Check your door handle to make sure it operates properly.
  8. Put the screws, switch and light back into place and that's it.

Top door clips - Close Up


Rear Doors (DSP Optioned cars only - Replacement stock tweeter with new MBQuart)
Just follow the instructions similiar to the front doors.

I had to drill out the older tweeter (two mounting points, very easy) and use Kwik 1 minute Epoxy to mount the new tweeter to the stock grill angled towards the passengers.  Then I used Camping Pad foam to secure behind the tweeter to keep it from moving if it came loose, and then use the Epoxy to secure the form to the panel. 

Left = MB Quart       Right = Stock

New Tweeter in place with Epoxy

Foam secured to panel to hold tweeter if it ever comes loose.

Note :  Not all pictures are mine, some are from http://209.24.95.253/bmwsite/bmwmain.htm

I copied them so that if that website ever disappears, the information is not lost.